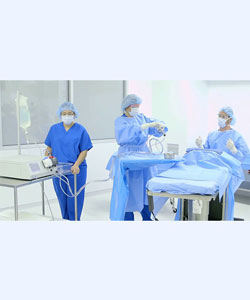
Symphion System Overview
In this video we’ll review the steps to set up and disassemble the Symphion System.
Setting up the Symphion System for Diagnostic Hysteroscopy
The Symphion system is a fully integrated less invasive solution designed to facilitate viewing with a hysteroscope during diagnostic and operative hysteroscopy, and provide fluid management through the closed loop, recirculation of filtered distension fluid and for resection and coagulation of uterine tissue such as inter-uterine polyps and myomas.
The Symphion System consists of a controller, a disposable fluid management system, an endoscope and a disposable resecting device.
- Place the controller on a secure surface with sufficient space next to it for the disposable fluid management accessory tray.
- Connect the power cord and the foot switch cable to the controller and turn it on.
- Remember to always follow the instructions on the controller screen before proceeding.
- Apply the biohazard sticker found in the fluid management box to a three liter irrigation saline bag and hang it on the hook of the saline pole.
- Press ok on the controller display to proceed.
Setting Up the Fluid Management System
The closed loop fluid management system delivers a continuous flow of sterile saline, helping to ensure continuous visualization and minimizing the risk of fluid overload.
- Following sterile practice, remove the introducer and the sterile connections of the tubing set and the pressure sensor from the fluid management tray, leaving the rest of the components inside.
- Place the fluid management tray next to the controller.
- Connect the introduce, the aspiration and infusion tube and the pressure sensor to the endoscope.
- Press ok on the controller screen to proceed.
- Insert the infusion and aspiration tubes into the corresponding color-coded pump heads.
- Remove caps and spike both ports of the saline bag.
- Repeatedly squeeze and release the drip chamber at the end of the infusion tube, until it is completely full of saline and the blue ball is at the top of the chamber.
- Connect the pressure sensor to the controller, press OK on the controller screen to proceed.
- The controller will run the pressure sensor self-test for approximately five seconds.
- Hold the scope in the sterile field over an empty receptacle and press ok to purge the system.
- Wait 9 seconds until the purge completes the controller will enter diagnostic mode.
- In diagnostic mode you will need to set the desired cavity pressure by pressing the up arrow on the controller screen.
- The endoscope is now ready for insertion into the uterine cavity.
- Infusion of saline will start when the button labeled infusion pump is pressed.
- Follow standard diagnostic hysteroscopy practices.
Setting up the Symphion System for Operative Hysteroscopy
The innovative bipolar RF plasma technology of the Symphion System removes uterine tissue, it monitors uterine pressure to avoid
cavity collapse and contains a safety coagulation feature to enhance visibility.
- To proceed to operative hysteroscopy you will begin the resection mode setup.
- Following sterile practice remove the resecting device from the tray and place it on the sterile table.
- Connect it to the controller.
- Disconnect the aspiration tube from the scope and attach it to the resecting device.
- Insert it into the working channel of the endoscope.
- Press 2 RESECTION on the controller screen.
- Follow standard operative hysteroscopy practices for resection.
Disassembling the Symphion System
The Symphion System is designed to be conveniently disassembled.
- Viable tissue specimens for histopathology evaluation are contained within the sealed tissue specimen container, which can be detached and sent to pathology.
- When you are ready to remove the resecting device and endoscope from the uterine cavity, turn off saline infusion by pressing the infusion pump button on the controller screen, remove the resecting device and the endoscope together from the uterine cavity.
- Wait 60 seconds for any fluid pressure to dissipate from the fluid management system.
- Remove the tissue catch and obtain the tissue specimens.
- Disconnect the pressure sensor and resecting device from the controller.
- Disconnect the pressure sensor and the infusion tubing from the endoscope
- Disconnect the introducer from the endoscope and remove it with the resecting device from the endoscope.
- Place the resecting device tubing and cable on the fluid management tray.
- Unhook the saline bag and place it on the fluid management tray.
- Open the pump heads to remove the tubing now you can dispose of the components.
- Disconnect the foot switch and turn off the controller.

